
There are two species of fruitflies that are commonly reared and used for feeding small herps. Drosophila melanogaster is the smaller of the two and completes it's life cycle in 2 ½ to 3 weeks. D. hydei is a little larger and takes an additional week or two to complete it's life cycle. They are not as prolific as D. melanogaster but make up for it with their larger size.

When you receive your shipment, carefully unpack the cultures from the shipping box and allow to reach normal room temperature. If the media has shifted during shipping, firmly tap the container down onto a counter top to re-settle it. Most of the adult flies should have survived shipping, however in the rare event that there are no obvious adults the culture will produce more within a couple days as they contain hundreds of larvae and eggs. The cultures should be kept away from temperature extremes as they will breed very slowly when too cold (60's) and become sterile at temperatures at or above 90 degrees. Feeder Cultures of D. hydei and D. melanogaster will produce several thousand flies over a 4-6 week time period. To ensure a steady supply never use all of the adults at one time for food. Always leave some adults in the culture container to continue laying eggs for the next generation.
To feed from the culture, gently but firmly tap the culture down onto a counter top to settle the flies away from the lid. Open the lid and shake some flies into the tank. Continuously tapping the sides of the culture cup will help keep the flies from crawling up the sides until you get the lid back on. Dusting fruit flies with a vitamin or mineral supplement can be done by tapping the flies into a cup containing some of the vitamin/mineral powder and then swirling and gently shaking the flies to coat them. The flies can then be fed in the same way described above.
There are several different types of media that can be used for culturing fruit flies. The instant formula we sell is one of the easiest and most reliable to use. It comes in a powder form that is simply mixed with water and yeast and is ready to use in minutes. It contains anti-oxidants and mold inhibitors- both of which help the cultures to last as long as possible. It is also odorless, allowing you to culture the flies indoors without offending the rest of the family. This type is colored blue to make the larvae more easily visible and is completely harmless to your pet.
It is also very important to make sure that the container used for culturing the flies be cleaned and sterilized between batches. Failure to do so can cause molds, fungi and bacteria to overrun the culture. Using our new disposable culture cups is the fastest and easiest way to be sure your cultures are set up clean.
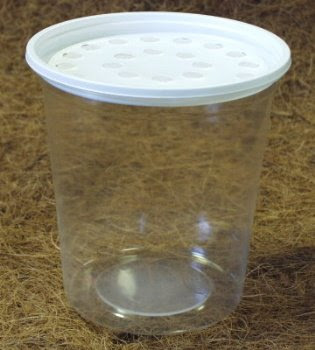
Culturing Flies using Instant Formula and 32 oz. Disposable Culture Cups
Add ½ cup of dry media to the culture cup
Add ½ cup of water* to the media and swirl to mix thoroughly. A thin layer of water remaining on top of the media just after mixing is normal and will be absorbed as the media solidifies.
Dissolve ¼ teaspoon of dry activated yeast in ½ cup of warm water. Allow it to sit for about 10-15 minutes. Stir the mixture and add about one tablespoon of the mixture to the culture cup trying to get even coverage across the surface of the media.
Once the yeast solution has been absorbed into the media add between 50-100 adult flies to the culture cup and close the lid.
For best results, a loose handful of shredded aspen (Excelsior) can be added to the culture cup to provide more surface area for the flies and achieve greater production.
Place the cultures in an area where they will not be exposed to temperature extremes. Normal room temps. of 70-75 degrees are ideal. Larvae should be evident within a week and new adults will begin hatching in approximately 3 weeks depending on temperature. *NOTE: Adding white vinegar to the water in a ratio of one part vinegar to 4 parts water will significantly reduce the chances of mold growth/contamination.
When culturing D. hydei it is important to wait 7-10 days after the initial hatch of adult flies before using them to start new cultures. This is because the first ones to hatch out are mostly females and the males follow a few days later. Production of D. hydei can be markedly improved by following this rule.The best flies to use for starting new cultures are those from the initial hatching. They are the largest and healthiest flies the culture will produce and will help maintain strong cultures. Waiting until the culture is almost completely spent before starting new ones will result in cultures becoming weaker and weaker.
The use of shredded aspen (Excelsior) also helps to increase yields from the cultures. It provides additional surface area for the flies, keeping them out of the media and potentially drowning.In areas with very low humidity, or during winter in most of the country, the cultures may tend to dry out prematurely. This can be avoided by using a little more water when first starting the cultures or by placing a sheet of cardboard over the lids of the culture cups to reduce the amount of ventilation.Molds and fungi are usually problems encountered when using homemade formulas and tend to be more common during the warm and humid summer months. When a culture becomes infected it should be destroyed. It should not be used for food and never to start new cultures. Using disposable cups will greatly reduce mold incidence.Dissolving the yeast in warm water and evenly distributing it across the surface of the media when starting new cultures will also virtually eliminate any mold problems. This is because the yeast will quickly out-compete any molds before they can get started.
Mites can sometimes wipe out entire cultures in just a few days. Fortunately, this usually only happens when flies are introduced from infected cultures or from wild stock. To prevent this, never use cultures that have been contaminated by wild flies and thoroughly check any cultures before using them to start new ones. Additionally, the use of insecticidal shelf paper will help prevent the spread of mites between cultures.Over time culture production may start to decline due to constant inbreeding of the flies. We recommend acquiring new flies once or twice a year to help keep production strong. When feeding small froglets it is sometimes helpful to keep the flies concentrated in a small area to make them easier to find. An easy way to do this is to place a wedge of orange on a baby food jar lid in the middle of the terrarium. The flies will be attracted to the orange and thus become easy targets. The orange should be replaced out every couple days to prevent it from spoiling in the tank.


